Difference between revisions of "Moab Hellmouth Sunbeams"
Lonestarlars (talk | contribs) (the intrateam-change hidden crap) |
Lonestarlars (talk | contribs) m (+falls) |
||
| Line 37: | Line 37: | ||
! colspan="2" |Cause | ! colspan="2" |Cause | ||
|- class="mw-customtoggle-intrateamRoster sorttop" style="text-align:center" | |- class="mw-customtoggle-intrateamRoster sorttop" style="text-align:center" | ||
| − | | colspan="8" |<span class="mw-ui-button mw-ui-progressive intrateam-toggle">'''Toggle Intrateam Moves (Fax, Voicemail, etc.)'''</span> | + | | colspan="8" style="text-align:center;" |<span class="mw-ui-button mw-ui-progressive intrateam-toggle">'''Toggle Intrateam Moves (Fax, Voicemail, etc.)'''</span> |
|- | |- | ||
|[[Season 3|03]] 2 | |[[Season 3|03]] 2 | ||
| Line 45: | Line 45: | ||
| style="text-align:center;" |🌞 | | style="text-align:center;" |🌞 | ||
| style="text-align:center;" |{{PositionIcon|Lineup}} | | style="text-align:center;" |{{PositionIcon|Lineup}} | ||
| − | |Incineration | + | |{{GameIcon|burning-skull}} Incineration |
| | | | ||
|- | |- | ||
| Line 54: | Line 54: | ||
| style="text-align:center;" |🌞 | | style="text-align:center;" |🌞 | ||
| style="text-align:center;" |{{PositionIcon|Lineup}} | | style="text-align:center;" |{{PositionIcon|Lineup}} | ||
| − | |Incineration | + | |{{GameIcon|burning-skull}} Incineration |
| | | | ||
|- | |- | ||
| Line 63: | Line 63: | ||
| style="text-align:center;" |🌞 | | style="text-align:center;" |🌞 | ||
| style="text-align:center;" |{{PositionIcon|Lineup}} | | style="text-align:center;" |{{PositionIcon|Lineup}} | ||
| − | |Incineration | + | |{{GameIcon|burning-skull}} Incineration |
| | | | ||
|- | |- | ||
| Line 72: | Line 72: | ||
| style="text-align:center;" |{{Teamemoji|Jazz Hands}} | | style="text-align:center;" |{{Teamemoji|Jazz Hands}} | ||
| style="text-align:center;" |{{PositionIcon|Lineup}} | | style="text-align:center;" |{{PositionIcon|Lineup}} | ||
| − | |Feedback | + | |{{GameIcon|microphone}} Feedback |
| | | | ||
|- | |- | ||
| Line 81: | Line 81: | ||
| style="text-align:center;" |{{Teamemoji|Lovers}} | | style="text-align:center;" |{{Teamemoji|Lovers}} | ||
| style="text-align:center;" |{{PositionIcon|Lineup}} | | style="text-align:center;" |{{PositionIcon|Lineup}} | ||
| − | |Feedback | + | |{{GameIcon|microphone}} Feedback |
| | | | ||
|- | |- | ||
| Line 90: | Line 90: | ||
| style="text-align:center;" |{{Teamemoji|Flowers}} | | style="text-align:center;" |{{Teamemoji|Flowers}} | ||
| style="text-align:center;" |{{PositionIcon|Lineup}} | | style="text-align:center;" |{{PositionIcon|Lineup}} | ||
| − | |Blessing (🌞) | + | |{{GameIcon|ticket}} Blessing (🌞) |
|Vulture | |Vulture | ||
|- | |- | ||
| Line 99: | Line 99: | ||
| style="text-align:center;" |[[Houston Spies|🕵️]] | | style="text-align:center;" |[[Houston Spies|🕵️]] | ||
| style="text-align:center;" |{{PositionIcon|Lineup}} | | style="text-align:center;" |{{PositionIcon|Lineup}} | ||
| − | |Feedback | + | |{{GameIcon|microphone}} Feedback |
| | | | ||
|- class="intrateam-change hidden" | |- class="intrateam-change hidden" | ||
| Line 105: | Line 105: | ||
|[[Joe Voorhees]] | |[[Joe Voorhees]] | ||
| style="text-align:center;" |{{PositionIcon|Lineup}} | | style="text-align:center;" |{{PositionIcon|Lineup}} | ||
| − | | | + | |Moved to |
| style="text-align:center;" |🌞 | | style="text-align:center;" |🌞 | ||
| style="text-align:center;" |{{PositionIcon|Shadows}} | | style="text-align:center;" |{{PositionIcon|Shadows}} | ||
| − | |Blessing (🌞) | + | |{{GameIcon|ticket}} Blessing (🌞) |
|Downsizing | |Downsizing | ||
|- | |- | ||
| Line 117: | Line 117: | ||
| style="text-align:center;" |🌞 | | style="text-align:center;" |🌞 | ||
| style="text-align:center;" |{{PositionIcon|Shadows}} | | style="text-align:center;" |{{PositionIcon|Shadows}} | ||
| − | |Playoff Birth | + | |{{GameIcon|egg-pod}} Playoff Birth |
| | | | ||
|- | |- | ||
| Line 126: | Line 126: | ||
| style="text-align:center;" |🌞 | | style="text-align:center;" |🌞 | ||
| style="text-align:center;" |{{PositionIcon|Shadows}} | | style="text-align:center;" |{{PositionIcon|Shadows}} | ||
| − | |Playoff Birth | + | |{{GameIcon|egg-pod}} Playoff Birth |
| | | | ||
|- | |- | ||
| Line 135: | Line 135: | ||
| style="text-align:center;" |🌞 | | style="text-align:center;" |🌞 | ||
| style="text-align:center;" |{{PositionIcon|Shadows}} | | style="text-align:center;" |{{PositionIcon|Shadows}} | ||
| − | |Playoff Birth | + | |{{GameIcon|egg-pod}} Playoff Birth |
| | | | ||
|- | |- | ||
| Line 144: | Line 144: | ||
| style="text-align:center;" |🌞 | | style="text-align:center;" |🌞 | ||
| style="text-align:center;" |{{PositionIcon|Shadows}} | | style="text-align:center;" |{{PositionIcon|Shadows}} | ||
| − | |Playoff Birth | + | |{{GameIcon|egg-pod}} Playoff Birth |
| | | | ||
|- | |- | ||
| Line 153: | Line 153: | ||
| style="text-align:center;" |{{Teamemoji|Tigers}} | | style="text-align:center;" |{{Teamemoji|Tigers}} | ||
| style="text-align:center;" |{{PositionIcon|Lineup}} | | style="text-align:center;" |{{PositionIcon|Lineup}} | ||
| − | |Will (🌞) | + | |{{GameIcon|ticket}} Will (🌞) |
|Plunder | |Plunder | ||
|- | |- | ||
| Line 162: | Line 162: | ||
| style="text-align:center;" |🌞 | | style="text-align:center;" |🌞 | ||
| style="text-align:center;" |{{PositionIcon|Lineup}} | | style="text-align:center;" |{{PositionIcon|Lineup}} | ||
| − | |Incineration | + | |{{GameIcon|burning-skull}} Incineration |
| | | | ||
|- | |- | ||
| Line 171: | Line 171: | ||
| style="text-align:center;" |{{Teamemoji|Tigers}} | | style="text-align:center;" |{{Teamemoji|Tigers}} | ||
| style="text-align:center;" |{{PositionIcon|Lineup}} | | style="text-align:center;" |{{PositionIcon|Lineup}} | ||
| − | |Will ({{Teamemoji|Tigers}}) | + | |{{GameIcon|ticket}} Will ({{Teamemoji|Tigers}}) |
|Plunder | |Plunder | ||
|- class="intrateam-change hidden" | |- class="intrateam-change hidden" | ||
| Line 180: | Line 180: | ||
| style="text-align:center;" |🌞 | | style="text-align:center;" |🌞 | ||
| style="text-align:center;" |{{PositionIcon|Shadows}} | | style="text-align:center;" |{{PositionIcon|Shadows}} | ||
| − | |Will (🌞) | + | |{{GameIcon|ticket}} Will (🌞) |
|Foreshadow | |Foreshadow | ||
|- | |- | ||
| Line 189: | Line 189: | ||
| style="text-align:center;" |🌞 | | style="text-align:center;" |🌞 | ||
| style="text-align:center;" |{{PositionIcon|Lineup}} | | style="text-align:center;" |{{PositionIcon|Lineup}} | ||
| − | |Second Wyatt Masoning | + | |{{GameIcon|microphone}} Second Wyatt Masoning |
| | | | ||
|- | |- | ||
| Line 197: | Line 197: | ||
| - | | - | ||
| | | | ||
| − | | | + | | |
| − | + | |{{Icon|bi:three-dots|label=Static}} Echoed into Static | |
| | | | ||
|- | |- | ||
| Line 207: | Line 207: | ||
| style="text-align:center;" |🌞 | | style="text-align:center;" |🌞 | ||
| style="text-align:center;" |{{PositionIcon|Shadows}} | | style="text-align:center;" |{{PositionIcon|Shadows}} | ||
| − | |Playoff Birth | + | |{{GameIcon|egg-pod}} Playoff Birth |
| | | | ||
|- class="intrateam-change hidden" | |- class="intrateam-change hidden" | ||
| Line 216: | Line 216: | ||
| style="text-align:center;" |🌞 | | style="text-align:center;" |🌞 | ||
| style="text-align:center;" |{{PositionIcon|Shadows}} | | style="text-align:center;" |{{PositionIcon|Shadows}} | ||
| − | |Will (🌞) | + | |{{GameIcon|ticket}} Will (🌞) |
|Foreshadow | |Foreshadow | ||
|- | |- | ||
| Line 225: | Line 225: | ||
| style="text-align:center;" |🌞 | | style="text-align:center;" |🌞 | ||
| style="text-align:center;" |{{PositionIcon|Shadows}} | | style="text-align:center;" |{{PositionIcon|Shadows}} | ||
| − | |Playoff Birth | + | |{{GameIcon|egg-pod}} Playoff Birth |
| | | | ||
|- | |- | ||
| Line 234: | Line 234: | ||
| style="text-align:center;" |{{Teamemoji|Pies}} | | style="text-align:center;" |{{Teamemoji|Pies}} | ||
| style="text-align:center;" |{{PositionIcon|Rotation}} | | style="text-align:center;" |{{PositionIcon|Rotation}} | ||
| − | |Will (🌞) | + | |{{GameIcon|ticket}} Will (🌞) |
|Equivalent Exchange | |Equivalent Exchange | ||
|- class="intrateam-change hidden" | |- class="intrateam-change hidden" | ||
| Line 243: | Line 243: | ||
| style="text-align:center;" |🌞 | | style="text-align:center;" |🌞 | ||
| style="text-align:center;" |{{PositionIcon|Shadows}} | | style="text-align:center;" |{{PositionIcon|Shadows}} | ||
| − | |Will (🌞) | + | |{{GameIcon|ticket}} Will (🌞) |
|Foreshadow | |Foreshadow | ||
|- | |- | ||
| Line 252: | Line 252: | ||
| style="text-align:center;" |[[Canada Moist Talkers|🗣️]] | | style="text-align:center;" |[[Canada Moist Talkers|🗣️]] | ||
| style="text-align:center;" |{{PositionIcon|Lineup}} | | style="text-align:center;" |{{PositionIcon|Lineup}} | ||
| − | |Will ([[Canada Moist Talkers|🗣️]]) | + | |{{GameIcon|ticket}} Will ([[Canada Moist Talkers|🗣️]]) |
|Equivalent Exchange | |Equivalent Exchange | ||
|- | |- | ||
| Line 261: | Line 261: | ||
| style="text-align:center;" |{{Teamemoji|Crabs}} | | style="text-align:center;" |{{Teamemoji|Crabs}} | ||
| style="text-align:center;" |{{PositionIcon|Lineup}} | | style="text-align:center;" |{{PositionIcon|Lineup}} | ||
| − | |Will ({{Teamemoji|Crabs}}) | + | |{{GameIcon|ticket}} Will ({{Teamemoji|Crabs}}) |
|Foreshadow | |Foreshadow | ||
|- | |- | ||
| Line 270: | Line 270: | ||
| style="text-align:center;" |{{Teamemoji|Pies}} | | style="text-align:center;" |{{Teamemoji|Pies}} | ||
| style="text-align:center;" |{{PositionIcon|Rotation}} | | style="text-align:center;" |{{PositionIcon|Rotation}} | ||
| − | |Will (🌞) | + | |{{GameIcon|ticket}} Will (🌞) |
|Equivalent Exchange | |Equivalent Exchange | ||
|- class="intrateam-change hidden" | |- class="intrateam-change hidden" | ||
| Line 279: | Line 279: | ||
| style="text-align:center;" |🌞 | | style="text-align:center;" |🌞 | ||
| style="text-align:center;" |{{PositionIcon|Shadows}} | | style="text-align:center;" |{{PositionIcon|Shadows}} | ||
| − | |Will (🌞) | + | |{{GameIcon|ticket}} Will (🌞) |
|Foreshadow | |Foreshadow | ||
|- | |- | ||
| Line 288: | Line 288: | ||
| style="text-align:center;" |{{Teamemoji|Worms}} | | style="text-align:center;" |{{Teamemoji|Worms}} | ||
| style="text-align:center;" |{{PositionIcon|Lineup}} | | style="text-align:center;" |{{PositionIcon|Lineup}} | ||
| − | |Feedback | + | |{{GameIcon|microphone}} Feedback |
| | | | ||
|- | |- | ||
| Line 297: | Line 297: | ||
| style="text-align:center;" |🌞 | | style="text-align:center;" |🌞 | ||
| style="text-align:center;" |{{PositionIcon|Shadows}} | | style="text-align:center;" |{{PositionIcon|Shadows}} | ||
| − | |Playoff Birth | + | |{{GameIcon|egg-pod}} Playoff Birth |
| | | | ||
|- class="intrateam-change hidden" | |- class="intrateam-change hidden" | ||
| Line 306: | Line 306: | ||
| style="text-align:center;" |🌞 | | style="text-align:center;" |🌞 | ||
| style="text-align:center;" |{{PositionIcon|Lineup}} | | style="text-align:center;" |{{PositionIcon|Lineup}} | ||
| − | |Will (🌞) | + | |{{GameIcon|ticket}} Will (🌞) |
|Move | |Move | ||
|- class="intrateam-change hidden" | |- class="intrateam-change hidden" | ||
| Line 315: | Line 315: | ||
| style="text-align:center;" |🌞 | | style="text-align:center;" |🌞 | ||
| style="text-align:center;" |{{PositionIcon|Shadows}} | | style="text-align:center;" |{{PositionIcon|Shadows}} | ||
| − | |Will (🌞) | + | |{{GameIcon|ticket}} Will (🌞) |
|Foreshadow | |Foreshadow | ||
|- | |- | ||
| Line 324: | Line 324: | ||
| style="text-align:center;" |{{Teamemoji|Garages}} | | style="text-align:center;" |{{Teamemoji|Garages}} | ||
| style="text-align:center;" |{{PositionIcon|Lineup}} | | style="text-align:center;" |{{PositionIcon|Lineup}} | ||
| − | |Will (🌞) | + | |{{GameIcon|ticket}} Will (🌞) |
|Equivalent Exchange | |Equivalent Exchange | ||
|- | |- | ||
| Line 333: | Line 333: | ||
| style="text-align:center;" |[[Houston Spies|🕵️]] | | style="text-align:center;" |[[Houston Spies|🕵️]] | ||
| style="text-align:center;" |{{PositionIcon|Lineup}} | | style="text-align:center;" |{{PositionIcon|Lineup}} | ||
| − | |Feedback | + | |{{GameIcon|microphone}} Feedback |
| | | | ||
|- | |- | ||
| Line 342: | Line 342: | ||
| style="text-align:center;" |🌞 | | style="text-align:center;" |🌞 | ||
| style="text-align:center;" |{{PositionIcon|Shadows}} | | style="text-align:center;" |{{PositionIcon|Shadows}} | ||
| − | |Playoff Birth | + | |{{GameIcon|egg-pod}} Playoff Birth |
| | | | ||
|- class="intrateam-change hidden" | |- class="intrateam-change hidden" | ||
| Line 351: | Line 351: | ||
| style="text-align:center;" |🌞 | | style="text-align:center;" |🌞 | ||
| style="text-align:center;" |{{PositionIcon|Shadows}} | | style="text-align:center;" |{{PositionIcon|Shadows}} | ||
| − | |Will (🌞) | + | |{{GameIcon|ticket}} Will (🌞) |
|Foreshadow | |Foreshadow | ||
|- | |- | ||
| Line 360: | Line 360: | ||
| style="text-align:center;" |{{Teamemoji|Garages}} | | style="text-align:center;" |{{Teamemoji|Garages}} | ||
| style="text-align:center;" |{{PositionIcon|Lineup}} | | style="text-align:center;" |{{PositionIcon|Lineup}} | ||
| − | |Will ({{Teamemoji|Garages}}) | + | |{{GameIcon|ticket}} Will ({{Teamemoji|Garages}}) |
|Equivalent Exchange | |Equivalent Exchange | ||
|- | |- | ||
| Line 369: | Line 369: | ||
| style="text-align:center;" |[[Houston Spies|🕵️]] | | style="text-align:center;" |[[Houston Spies|🕵️]] | ||
| style="text-align:center;" |{{PositionIcon|Lineup}} | | style="text-align:center;" |{{PositionIcon|Lineup}} | ||
| − | |Feedback | + | |{{GameIcon|microphone}} Feedback |
| | | | ||
|- class="intrateam-change hidden" | |- class="intrateam-change hidden" | ||
| Line 378: | Line 378: | ||
| style="text-align:center;" |🌞 | | style="text-align:center;" |🌞 | ||
| style="text-align:center;" |{{PositionIcon|Shadows}} | | style="text-align:center;" |{{PositionIcon|Shadows}} | ||
| − | |Will (🌞) | + | |{{GameIcon|ticket}} Will (🌞) |
|Foreshadow | |Foreshadow | ||
|- | |- | ||
| Line 387: | Line 387: | ||
| style="text-align:center;" |{{Teamemoji|Pies}} | | style="text-align:center;" |{{Teamemoji|Pies}} | ||
| style="text-align:center;" |{{PositionIcon|Rotation}} | | style="text-align:center;" |{{PositionIcon|Rotation}} | ||
| − | |Will ({{Teamemoji|Pies}}) | + | |{{GameIcon|ticket}} Will ({{Teamemoji|Pies}}) |
|Equivalent Exchange | |Equivalent Exchange | ||
|- | |- | ||
| Line 396: | Line 396: | ||
| style="text-align:center;" |🌞 | | style="text-align:center;" |🌞 | ||
| style="text-align:center;" |{{PositionIcon|Shadows}} | | style="text-align:center;" |{{PositionIcon|Shadows}} | ||
| − | |Playoff Birth | + | |{{GameIcon|egg-pod}} Overbracket Playoff Birth |
| | | | ||
|- class="intrateam-change hidden" | |- class="intrateam-change hidden" | ||
| Line 402: | Line 402: | ||
|[[Elvis Figueroa]] | |[[Elvis Figueroa]] | ||
| style="text-align:center;" |{{PositionIcon|Lineup}} | | style="text-align:center;" |{{PositionIcon|Lineup}} | ||
| − | | | + | |Moved to |
| style="text-align:center;" |🌞 | | style="text-align:center;" |🌞 | ||
| style="text-align:center;" |{{PositionIcon|Rotation}} | | style="text-align:center;" |{{PositionIcon|Rotation}} | ||
| − | |Blessing (🌞) | + | |{{GameIcon|ticket}} Blessing (🌞) |
|Slowpoke | |Slowpoke | ||
|- | |- | ||
| Line 414: | Line 414: | ||
| style="text-align:center;" |[[Houston Spies|🕵️]] | | style="text-align:center;" |[[Houston Spies|🕵️]] | ||
| style="text-align:center;" |{{PositionIcon|Lineup}} | | style="text-align:center;" |{{PositionIcon|Lineup}} | ||
| − | |Feedback | + | |{{GameIcon|microphone}} Feedback |
| | | | ||
|- class="intrateam-change hidden" | |- class="intrateam-change hidden" | ||
| Line 423: | Line 423: | ||
| style="text-align:center;" |🌞 | | style="text-align:center;" |🌞 | ||
| style="text-align:center;" |{{PositionIcon|Shadows}} | | style="text-align:center;" |{{PositionIcon|Shadows}} | ||
| − | |Fax Machine | + | |{{GameIcon|power-generator}} Fax Machine |
| | | | ||
|- | |- | ||
| Line 432: | Line 432: | ||
| style="text-align:center;" |🌞 | | style="text-align:center;" |🌞 | ||
| style="text-align:center;" |{{PositionIcon|Shadows}} | | style="text-align:center;" |{{PositionIcon|Shadows}} | ||
| − | |Playoff Birth | + | |{{GameIcon|egg-pod}} Underbracket Playoff Birth |
| | | | ||
|- | |- | ||
| Line 441: | Line 441: | ||
| style="text-align:center;" |{{Teamemoji|Jazz Hands}} | | style="text-align:center;" |{{Teamemoji|Jazz Hands}} | ||
| style="text-align:center;" |{{PositionIcon|Lineup}} | | style="text-align:center;" |{{PositionIcon|Lineup}} | ||
| − | |Will ({{Teamemoji|Jazz Hands}}) | + | |{{GameIcon|ticket}} Will ({{Teamemoji|Jazz Hands}}) |
|Equivalent Exchange | |Equivalent Exchange | ||
|- class="intrateam-change hidden" | |- class="intrateam-change hidden" | ||
| Line 447: | Line 447: | ||
|[[Harriet Gildehaus]] | |[[Harriet Gildehaus]] | ||
| style="text-align:center;" |{{PositionIcon|Rotation}} | | style="text-align:center;" |{{PositionIcon|Rotation}} | ||
| − | | | + | |Moved to |
| style="text-align:center;" |🌞 | | style="text-align:center;" |🌞 | ||
| style="text-align:center;" |{{PositionIcon|Shadows}} | | style="text-align:center;" |{{PositionIcon|Shadows}} | ||
| − | |Will (🌞) | + | |{{GameIcon|ticket}} Will (🌞) |
|Move | |Move | ||
|- | |- | ||
|[[Season 21#Election_Results|21]] EL<span style="font-size:0">02</span> | |[[Season 21#Election_Results|21]] EL<span style="font-size:0">02</span> | ||
|[[Jasper Blather]] | |[[Jasper Blather]] | ||
| − | | style="text-align:center;" |{{ | + | | style="text-align:center;" |{{PositionIcon|Lineup}} |
| − | | | + | |Roamed to |
| style="text-align:center;" |{{Teamemoji|Worms}} | | style="text-align:center;" |{{Teamemoji|Worms}} | ||
| style="text-align:center;" |{{PositionIcon|Lineup}} | | style="text-align:center;" |{{PositionIcon|Lineup}} | ||
| − | |Roamin' | + | |{{GameIcon|chariot}} Roamin' |
| | | | ||
|- | |- | ||
|[[Season 22#Latesiesta|22]] LS | |[[Season 22#Latesiesta|22]] LS | ||
| - | | - | ||
| − | | | + | | |
|[[Goodwin Morin III]] | |[[Goodwin Morin III]] | ||
| style="text-align:center;" |🌞 | | style="text-align:center;" |🌞 | ||
| style="text-align:center;" |{{PositionIcon|Lineup}} | | style="text-align:center;" |{{PositionIcon|Lineup}} | ||
| − | |Gift Shop | + | |{{GameIcon|puppet}} Gift Shop |
| | | | ||
|- class="intrateam-change hidden" | |- class="intrateam-change hidden" | ||
| Line 477: | Line 477: | ||
| style="text-align:center;" |🌞 | | style="text-align:center;" |🌞 | ||
| style="text-align:center;" |{{PositionIcon|Shadows}} | | style="text-align:center;" |{{PositionIcon|Shadows}} | ||
| − | |Fax Machine | + | |{{GameIcon|power-generator}} Fax Machine |
| | | | ||
|- | |- | ||
| Line 486: | Line 486: | ||
| style="text-align:center;" |🌞 | | style="text-align:center;" |🌞 | ||
| style="text-align:center;" |{{PositionIcon|Shadows}} | | style="text-align:center;" |{{PositionIcon|Shadows}} | ||
| − | |Playoff Birth | + | |{{GameIcon|egg-pod}} Overbracket Playoff Birth |
| | | | ||
|- | |- | ||
| Line 495: | Line 495: | ||
| style="text-align:center;" |{{Teamemoji|tacos}} | | style="text-align:center;" |{{Teamemoji|tacos}} | ||
| style="text-align:center;" |{{PositionIcon|Lineup}} | | style="text-align:center;" |{{PositionIcon|Lineup}} | ||
| − | |Will ({{Teamemoji|tacos}}) | + | |{{GameIcon|ticket}} Will ({{Teamemoji|tacos}}) |
|Equivalent Exchange | |Equivalent Exchange | ||
|- | |- | ||
| Line 501: | Line 501: | ||
|[[Avila Baker]] | |[[Avila Baker]] | ||
| style="text-align:center;" |{{PositionIcon|Shadows}} | | style="text-align:center;" |{{PositionIcon|Shadows}} | ||
| − | | | + | |Sent to |
| style="text-align:center;" |{{Teamemoji|garages}} | | style="text-align:center;" |{{Teamemoji|garages}} | ||
| style="text-align:center;" |{{PositionIcon|Shadows}} | | style="text-align:center;" |{{PositionIcon|Shadows}} | ||
| − | |Blessing ({{Teamemoji|garages}}) | + | |{{GameIcon|ticket}} Blessing ({{Teamemoji|garages}}) |
|Gachapon | |Gachapon | ||
|- | |- | ||
| Line 510: | Line 510: | ||
||[[Goodwin Morin III]] | ||[[Goodwin Morin III]] | ||
| style="text-align:center;" |{{PositionIcon|Lineup}} | | style="text-align:center;" |{{PositionIcon|Lineup}} | ||
| − | | - | + | | Returned to |
| − | | | + | | style="text-align:center;"|{{Teamemoji|vault legends}} |
| − | | style="text-align:center;" |{{Icon|wi:dust | + | | style="text-align:center;"|{{PositionIcon|Lineup}} |
| − | + | |{{Icon|wi:dust|label=dust}} Faded to Dust | |
| | | | ||
|- class="intrateam-change hidden" | |- class="intrateam-change hidden" | ||
| Line 522: | Line 522: | ||
| style="text-align:center;" |🌞 | | style="text-align:center;" |🌞 | ||
| style="text-align:center;" |{{PositionIcon|Shadows}} | | style="text-align:center;" |{{PositionIcon|Shadows}} | ||
| − | |Fax Machine | + | |{{GameIcon|power-generator}} Fax Machine |
| | | | ||
|- class="intrateam-change hidden" | |- class="intrateam-change hidden" | ||
| Line 531: | Line 531: | ||
| style="text-align:center;" |🌞 | | style="text-align:center;" |🌞 | ||
| style="text-align:center;" |{{PositionIcon|Shadows}} | | style="text-align:center;" |{{PositionIcon|Shadows}} | ||
| − | |Fax Machine | + | |{{GameIcon|power-generator}} Fax Machine |
| | | | ||
|- class="intrateam-change hidden" | |- class="intrateam-change hidden" | ||
| Line 540: | Line 540: | ||
| style="text-align:center;" |🌞 | | style="text-align:center;" |🌞 | ||
| style="text-align:center;" |{{PositionIcon|Shadows}} | | style="text-align:center;" |{{PositionIcon|Shadows}} | ||
| − | |Fax Machine | + | |{{GameIcon|power-generator}} Fax Machine |
| | | | ||
|- class="intrateam-change hidden" | |- class="intrateam-change hidden" | ||
| Line 549: | Line 549: | ||
| style="text-align:center;" |🌞 | | style="text-align:center;" |🌞 | ||
| style="text-align:center;" |{{PositionIcon|Shadows}} | | style="text-align:center;" |{{PositionIcon|Shadows}} | ||
| − | |Fax Machine | + | |{{GameIcon|power-generator}} Fax Machine |
| | | | ||
|- class="intrateam-change hidden" | |- class="intrateam-change hidden" | ||
| Line 558: | Line 558: | ||
| style="text-align:center;" |🌞 | | style="text-align:center;" |🌞 | ||
| style="text-align:center;" |{{PositionIcon|Shadows}} | | style="text-align:center;" |{{PositionIcon|Shadows}} | ||
| − | |Fax Machine | + | |{{GameIcon|power-generator}} Fax Machine |
| | | | ||
|- class="intrateam-change hidden" | |- class="intrateam-change hidden" | ||
| Line 567: | Line 567: | ||
| style="text-align:center;" |🌞 | | style="text-align:center;" |🌞 | ||
| style="text-align:center;" |{{PositionIcon|Shadows}} | | style="text-align:center;" |{{PositionIcon|Shadows}} | ||
| − | |Voicemail | + | |{{GameIcon|candlestick-phone}} Voicemail |
| | | | ||
|- class="intrateam-change hidden" | |- class="intrateam-change hidden" | ||
| Line 576: | Line 576: | ||
| style="text-align:center;" |🌞 | | style="text-align:center;" |🌞 | ||
| style="text-align:center;" |{{PositionIcon|Shadows}} | | style="text-align:center;" |{{PositionIcon|Shadows}} | ||
| − | |Fax Machine | + | |{{GameIcon|power-generator}} Fax Machine |
| | | | ||
|- | |- | ||
|[[Season 23|23]] 51 | |[[Season 23|23]] 51 | ||
| - | | - | ||
| − | | | + | | |
|[[Donia Bailey]] | |[[Donia Bailey]] | ||
| style="text-align:center;" |[[Houston Spies|🕵️]] | | style="text-align:center;" |[[Houston Spies|🕵️]] | ||
| style="text-align:center;" |{{PositionIcon|Shadows}} | | style="text-align:center;" |{{PositionIcon|Shadows}} | ||
| − | | | + | |{{GameIcon|domino-mask}} Phantom Thieves' Guild (🌞) |
| − | | | + | | |
|- | |- | ||
|[[Season 23|23]] 63 | |[[Season 23|23]] 63 | ||
| - | | - | ||
| − | | | + | | |
|[[Dunlap Figueroa]] | |[[Dunlap Figueroa]] | ||
| style="text-align:center;" |{{Teamemoji|dale}} | | style="text-align:center;" |{{Teamemoji|dale}} | ||
| style="text-align:center;" |{{PositionIcon|Rotation}} | | style="text-align:center;" |{{PositionIcon|Rotation}} | ||
| − | |Roamin' | + | |{{GameIcon|chariot}} Super Roamin' |
| − | | | + | |[[The Fifth Base (Item)|The Fifth Base]] |
|- | |- | ||
|[[Season 23|23]] 72 | |[[Season 23|23]] 72 | ||
|[[Dunlap Figueroa]] | |[[Dunlap Figueroa]] | ||
| − | | style="text-align:center;" |{{ | + | | style="text-align:center;" |{{PositionIcon|Rotation}} |
| − | | | + | |Super roamed to |
| style="text-align:center;" |[[Houston Spies|🕵️]] | | style="text-align:center;" |[[Houston Spies|🕵️]] | ||
| style="text-align:center;" |{{PositionIcon|Rotation}} | | style="text-align:center;" |{{PositionIcon|Rotation}} | ||
| − | |Roamin' | + | |{{GameIcon|chariot}} Super Roamin' |
| − | | | + | |[[The Fifth Base (Item)|The Fifth Base]] |
|- class="intrateam-change hidden" | |- class="intrateam-change hidden" | ||
|[[Season 23|23]] 82 | |[[Season 23|23]] 82 | ||
| Line 612: | Line 612: | ||
| style="text-align:center;" |🌞 | | style="text-align:center;" |🌞 | ||
| style="text-align:center;" |{{PositionIcon|Shadows}} | | style="text-align:center;" |{{PositionIcon|Shadows}} | ||
| − | |Fax Machine | + | |{{GameIcon|power-generator}} Fax Machine |
| | | | ||
|- class="intrateam-change hidden" | |- class="intrateam-change hidden" | ||
| Line 621: | Line 621: | ||
| style="text-align:center;" |🌞 | | style="text-align:center;" |🌞 | ||
| style="text-align:center;" |{{PositionIcon|Shadows}} | | style="text-align:center;" |{{PositionIcon|Shadows}} | ||
| − | |Fax Machine | + | |{{GameIcon|power-generator}} Fax Machine |
| | | | ||
|- | |- | ||
| Line 630: | Line 630: | ||
| style="text-align:center;" |🌞 | | style="text-align:center;" |🌞 | ||
| style="text-align:center;" |{{PositionIcon|Shadows}} | | style="text-align:center;" |{{PositionIcon|Shadows}} | ||
| − | |Playoff Birth | + | |{{GameIcon|egg-pod}} Overbracket Playoff Birth |
| | | | ||
|- | |- | ||
| Line 636: | Line 636: | ||
|[[Nagomi Nava]] | |[[Nagomi Nava]] | ||
| style="text-align:center;" |{{PositionIcon|Lineup}} | | style="text-align:center;" |{{PositionIcon|Lineup}} | ||
| − | | | + | |Drafted by |
| style="text-align:center;" |{{Teamemoji|rising stars}} | | style="text-align:center;" |{{Teamemoji|rising stars}} | ||
| style="text-align:center;" |{{PositionIcon|Lineup}} | | style="text-align:center;" |{{PositionIcon|Lineup}} | ||
| − | |ILB Semi-Centennial | + | |{{GameIcon|medallist}} Drafted to the ILB Semi-Centennial ({{Teamemoji|rising stars}}) |
| | | | ||
|- | |- | ||
| Line 648: | Line 648: | ||
| style="text-align:center;" |{{Teamemoji|rising stars}} | | style="text-align:center;" |{{Teamemoji|rising stars}} | ||
| style="text-align:center;" |{{PositionIcon|Rotation}} | | style="text-align:center;" |{{PositionIcon|Rotation}} | ||
| − | |ILB Semi-Centennial | + | |{{GameIcon|medallist}} Returned from the ILB Semi-Centennial |
| | | | ||
|- | |- | ||
| Line 654: | Line 654: | ||
|[[Chris Koch]] | |[[Chris Koch]] | ||
| style="text-align:center;" |{{PositionIcon|Shadows}} | | style="text-align:center;" |{{PositionIcon|Shadows}} | ||
| − | | | + | |Sent to |
| style="text-align:center;" |{{Teamemoji|tacos}} | | style="text-align:center;" |{{Teamemoji|tacos}} | ||
| style="text-align:center;" |{{PositionIcon|Shadows}} | | style="text-align:center;" |{{PositionIcon|Shadows}} | ||
| − | |Blessing ({{Teamemoji|tacos}}) | + | |{{GameIcon|ticket}} Blessing ({{Teamemoji|tacos}}) |
|Gachapon | |Gachapon | ||
|- class="intrateam-change hidden" | |- class="intrateam-change hidden" | ||
| Line 666: | Line 666: | ||
| style="text-align:center;" |🌞 | | style="text-align:center;" |🌞 | ||
| style="text-align:center;" |{{PositionIcon|Shadows}} | | style="text-align:center;" |{{PositionIcon|Shadows}} | ||
| − | |Fax Machine | + | |{{GameIcon|power-generator}} Fax Machine |
| | | | ||
|- class="intrateam-change hidden" | |- class="intrateam-change hidden" | ||
| Line 675: | Line 675: | ||
| style="text-align:center;" |🌞 | | style="text-align:center;" |🌞 | ||
| style="text-align:center;" |{{PositionIcon|Shadows}} | | style="text-align:center;" |{{PositionIcon|Shadows}} | ||
| − | |Night Shift | + | |{{Icon|ion:cloudy-night-sharp|label=Night}} Night Shift |
| | | | ||
|- class="intrateam-change hidden" | |- class="intrateam-change hidden" | ||
| Line 684: | Line 684: | ||
| style="text-align:center;" |🌞 | | style="text-align:center;" |🌞 | ||
| style="text-align:center;" |{{PositionIcon|Shadows}} | | style="text-align:center;" |{{PositionIcon|Shadows}} | ||
| − | |Night Shift | + | |{{Icon|ion:cloudy-night-sharp|label=Night}} Night Shift |
| | | | ||
|- class="intrateam-change hidden" | |- class="intrateam-change hidden" | ||
| Line 693: | Line 693: | ||
| style="text-align:center;" |🌞 | | style="text-align:center;" |🌞 | ||
| style="text-align:center;" |{{PositionIcon|Shadows}} | | style="text-align:center;" |{{PositionIcon|Shadows}} | ||
| − | |Night Shift | + | |{{Icon|ion:cloudy-night-sharp|label=Night}} Night Shift |
| + | | | ||
| + | |- | ||
| + | |[[Fall Ball|FB]] | ||
| + | | - | ||
| + | | | ||
| + | |[[Pangolin Ruiz]] | ||
| + | | style="text-align:center;"|{{Teamemoji|flowers}} | ||
| + | | style="text-align:center;"|{{PositionIcon|lineup}} | ||
| + | |{{GameIcon|vortex}} Fall Ball | ||
| + | | | ||
| + | |- | ||
| + | |[[Fall Ball|FB]] | ||
| + | |[[Alvie Kesh]] | ||
| + | | style="text-align:center;"|{{PositionIcon|shadows}} | ||
| + | |Fell to | ||
| + | | style="text-align:center;"|{{Teamemoji|lovers}} | ||
| + | | | ||
| + | |{{GameIcon|vortex}} Fall Ball | ||
| | | | ||
|} | |} | ||
Revision as of 03:06, 30 October 2022
The Hellmouth Sunbeams (formerly the Moab Sunbeams) are a professional Blaseball team based in Hellmouth, Utah. They have been a part of Internet League Blaseball since Season A and compete in the Wild Low division of the Wild League, having previously been members of the Lawful Evil division of the Evil League.
Roster
Select Tlopps cards can be found here.
Player History
For a list of all former players, see Category:Former Hellmouth Sunbeams Players.
| Date | Removed | Added | Cause | ||||
|---|---|---|---|---|---|---|---|
| 03 2 | Rhys Trombone | Dudley Mueller | 🌞 | Incineration | |||
| 03 23 | Velasquez Meadows | Alexander Horne | 🌞 | Incineration | |||
| 05 91 | Emmett Internet | Sutton Bishop | 🌞 | Incineration | |||
| 06 44 | Randall Marijuana | Hendricks Richardson | 👐 | Feedback | |||
| 06 61 | Alexander Horne | Sigmund Castillo | 💋 | Feedback | |||
| 06 EL | Alaynabella Hollywood | Hahn Fox | 🌹 | Blessing (🌞) | Vulture | ||
| 07 60 | Malik Romayne | Joe Voorhees | 🕵️ | Feedback | |||
| 09 99 | - | Lotus Clutch | 🌞 | Playoff Birth | |||
| 10 99 | - | Nucleus Cresthill | 🌞 | Playoff Birth | |||
| 11 99 | - | Elwin Blaskets | 🌞 | Playoff Birth | |||
| 12 99 | - | Harriet Gildehaus | 🌞 | Playoff Birth | |||
| 12 EL00 | Nerd Pacheco | Aldon Cashmoney | 🐅 | Will (🌞) | Plunder | ||
| 13 98 | Sutton Bishop | Kaj Statter Jr. | 🌞 | Incineration | |||
| 13 EL00 | Aldon Cashmoney | Richmond Harrison | 🐅 | Will (🐅) | Plunder | ||
| 14 LS | - | Wyatt Mason VII | 🌞 | Second Wyatt Masoning | |||
| 14 81 | Wyatt Mason VII | - | Echoed into Static | ||||
| 14 99 | - | Noquiryn Ratoon | 🌞 | Playoff Birth | |||
| 15 99 | - | Kevelyn Clambucket | 🌞 | Playoff Birth | |||
| 15 EL00 | Zack Sanders | Elvis Figueroa | 🥧 | Will (🌞) | Equivalent Exchange | ||
| 16 EL00 | Richmond Harrison | Alston Cerveza | 🗣️ | Will (🗣️) | Equivalent Exchange | ||
| 16 EL01 | Alston Cerveza | Brisket Friendo | 🦀 | Will (🦀) | Foreshadow | ||
| 16 EL02 | Elvis Figueroa | Zack Sanders | 🥧 | Will (🌞) | Equivalent Exchange | ||
| 17 28 | Igneus Delacruz | Kaz Fiasco | 🐌 | Feedback | |||
| 17 99 | - | Bobbin Inningson | 🌞 | Playoff Birth | |||
| 17 EL02 | Brisket Friendo | Howell Franklin | 🎸 | Will (🌞) | Equivalent Exchange | ||
| 18 64 | Dudley Mueller | Avila Guzman | 🕵️ | Feedback | |||
| 18 99 | - | Phineas Wormthrice | 🌞 | Playoff Birth | |||
| 18 EL01 | Avila Guzman | Quack Enjoyable | 🎸 | Will (🎸) | Equivalent Exchange | ||
| 19 41 | Quack Enjoyable | Siobhan Chark | 🕵️ | Feedback | |||
| 19 EL01 | Kaz Fiasco | Elvis Figueroa | 🥧 | Will (🥧) | Equivalent Exchange | ||
| 20 99 | - | Borg Ruiz | 🌞 | Overbracket Playoff Birth | |||
| 21 5 | Siobhan Chark | Comfort Septemberish | 🕵️ | Feedback | |||
| 21 99 | - | Frankie Crumpet | 🌞 | Underbracket Playoff Birth | |||
| 21 EL00 | Comfort Septemberish | Jasper Blather | 👐 | Will (👐) | Equivalent Exchange | ||
| 21 EL02 | Jasper Blather | Roamed to | 🐌 | Roamin' | |||
| 22 LS | - | Goodwin Morin III | 🌞 | Gift Shop | |||
| 22 99 | - | Guy Gulp | 🌞 | Overbracket Playoff Birth | |||
| 22 EL00 | Hendricks Richardson | Son Jensen | 🌮 | Will (🌮) | Equivalent Exchange | ||
| 22 EL01 | Avila Baker | Sent to | 🎸 | Blessing (🎸) | Gachapon | ||
| 22 EL02 | Goodwin Morin III | Returned to | 🏅 | Faded to Dust | |||
| 23 51 | - | Donia Bailey | 🕵️ | Phantom Thieves' Guild (🌞) | |||
| 23 63 | - | Dunlap Figueroa | 🚤 | Super Roamin' | The Fifth Base | ||
| 23 72 | Dunlap Figueroa | Super roamed to | 🕵️ | Super Roamin' | The Fifth Base | ||
| 23 99 | - | Alvie Kesh | 🌞 | Overbracket Playoff Birth | |||
| 23 11700 | Nagomi Nava | Drafted by | 💫 | Drafted to the ILB Semi-Centennial (💫) | |||
| 23 11701 | - | Nagomi Nava | 💫 | Returned from the ILB Semi-Centennial | |||
| 23 EL00 | Chris Koch | Sent to | 🌮 | Blessing (🌮) | Gachapon | ||
| FB | - | Pangolin Ruiz | 🌹 | Fall Ball | |||
| FB | Alvie Kesh | Fell to | 💋 | Fall Ball | |||
Season Results
For a full season by season breakdown see the Sunbeams' Season Summaries, starting from Season 1.
The Discipline Era (Seasons 1–11)
| Discipline Era | |||||||
|---|---|---|---|---|---|---|---|
| Season | Wins | Record | Postseason | Election | |||
| 1 | 40 | 40-59 | N/A | None | |||
| 2 | 37 | 37-62 | N/A |
| |||
| 3 | 38 | 38-61 | N/A | None | |||
| 4 | 40 | 40-59 | N/A |
| |||
| 5 | 35 | 35-64 | N/A |
| |||
| 6 | 47 | 47-52 | N/A |
| |||
| 7 | 54 | 54-45 | N/A |
| |||
| 8 | 59 | 59-40 | 🌞 | 0 - 3 | 🕵️ |
| |
| 9 | 51 | 51-48 | 🌞 | 2 - 0 | 🔥 |
| |
| 🦀 | 3 - 0 | 🌞 | |||||
| 10 | 33 | 33-66 | 🌞 | 2 - 0 | 🌮 |
| |
| 🦀 | 3 - 0 | 🌞 | |||||
| 11 | 68 | 68-39 | 🌞 | 3 - (-1) | 🕵️ |
| |
| 🐅 | 3 - 5 | 🌞 | |||||
| 🌞 | 3 - 1 | 🎸 | |||||
| ILB Champs ● | |||||||
The Expansion Era (Seasons 12–24)
| Expansion Era | |||||||
|---|---|---|---|---|---|---|---|
| Season | Wins | Record | Postseason | Election | |||
| 12 | 58 | 57-42 | 🌞 | 3 - 2 | 👐 |
| |
| 🐅 | 3 - 1 | 🌞 | |||||
| 13 | 52 | 47-52 | N/A |
| |||
| 14 | 56 | 56-43 | 🌞 | 0 - 3 | 🌮 |
| |
| 15 | 58 | 58-41 | 🌞 | 0 - 3 | 🍗 |
| |
| 16 | 42 | 42-57 | N/A |
| |||
| 17 | 37 | 37-62 | 🌞 | 0 - 2 | 🔥 | The Hellmouth Sunbeams receive a Free Will!
| |
| 18 | 47 | 47-52 | 🌞 | 2 - 1 | 🕵️ |
| |
| 🌹 | 3 - 1 | 🌞 | |||||
| 19 | -56 | 55-44 | N/A |
| |||
| 20 | 64 | 60-39 | 🌞 | 1 - 3 | 🌮 |
| |
| 21 | 63 | 55-44 | 🌞 | 2 - 1 | 🚤 |
| |
| 🍗 | 1 - 3 | 🌞 | |||||
| 🌞 | 3 - 2 | 🏋️ | |||||
| 🗣️ | 0 - 3 | 🌞 | |||||
| ILB Champs ●● | |||||||
| 22 | 78 | 63-36 | 🌞 | 3 - 2 | 🍗 |
| |
| 🏋️ | 3 - 2 | 🌞 | |||||
| 23 | 79 | 63-36 | 🌞 | 3 - 2 | 🚤 |
| |
| 🐌 | 3 - 2 | 🌞 | |||||
| 24 | 24 | 57-42 | N/A | There was no election in Season 24 due to the nullification of Blaseball. | |||
History
The remainder of this article contains lore created collaboratively by the Blaseball community.
For a timeline of notable events which have happened to the Hellmouth Sunbeams, see Hellmouth Sunbeams/History.
Team Chemistry
The Sunbeams are known for their great team chemistry, and relaxed vibes that may surprise some given their historically poor record of being good at Blaseball. Overall, the Sunbeams haven taken a philosophical approach to their poor performances in seasons past, rationalising that compared to the latent daily horror of life in the Immaterial Plane, the Blaseball League, and on the teetering lip of a pit dropping straight into hell, "being bad at Blaseball isn't worth losing braincells over." Nobody blames anybody after a loss, and win or lose they all go get smoothies from the Shadow Moabbey. It is not recommended that anyone outside the team drinks the smoothies from the Moabbey. The players have worked very hard to be able to tolerate those god-awful smoothies, and fans are certainly unprepared.
The Sunbeams are also major figures in the wider Hellmouth community, with a strong sense of responsibility to be good role models who strongly discourage anyone from trying to come to Hellmouth. Even visitors planning only a short trip run the risk of experiencing the Tug, and/or gaining an Adaptation which would forever tie them to the accursed place the Sunbeams call home. However, should fate, blessings, weather, misfortune, elections, or grim determination bring a newcomer to the Sunbeams roster, the team will do all they can to help the new player feel welcome. The orientation programs are an ad-hoc affair, but combine practical advice for surviving in Hellmouth with haphazard explanations of Igneus "Iggy" Delacruz and Miguel James' theatrics and antics.
Many players on the Sunbeams roster are active members in the community: running local businesses, guest lecturing at Hellmouth Community College, or offering services to make Hellmouth that little bit less inhospitable for everyone living there.
Rivalries
For more information about the Sunbeams' concept of rivalries, and a list of known rivalries, see Hellmouth Sunbeams/Rivalries.

The Sunbeams have a complicated relationship with rivalries, a label which oft-encompasses a range of complicated and nuanced emotional relationships. Rivalry, as understood by the Sunbeams and their fans, involves:
- wistfully watching their rival's matches, hoping to face them in battle once again
- fiercely defending a rival from others, for only You are allowed to defeat them
- cheering for the rival as they grow, overcome trials and reveal new strengths, as such development is a hallmark for any worthy rival
- being unable to think of anyone other than the rival
- on dark nights wondering if they're staring into the same sun, cursing your name.
In the spirit of competition, everyone in the League is a rival of the Hellmouth Sunbeams, though some rivalries have been developed to the point they fall under a separate category of Major Rivalry, Rivalliance, or Anti-Rival. To learn more about these rivalries, or to find out your team's rivalry-status with the Sunbeams, please view the Rivalries subpage.
Staff
Coaches
- Sol, head coach
- Monsieur Bean (possibly Monsieur Beam), personal assistant to the head coach
- Velasquez Meadows's Ghost, manager
- Addie Tantalus, asst. coach
- [No known first name] Nakamura, asst. coach
- Determination Montgomery, batting coach
- Beef Randolph, nutritionist
Additional Personnel
- JEFF, "mascot"
- Dead Tom, the fan
- The Man Who Owns All the Teeth, sponsor
- The entire population of Bishop Sutton
- Moon Roomba
Stadium
See the main article on this topic: Lower Moab Scenic Overlook Field
Lower Moab Scenic Overlook Field is located in the western part of downtown Hellmouth, just off of BAD 191. Its grounds rest on the edge of the main Hellmouth sinkhole, and are bisected by several smaller sinkholes, cracks, teeth, and ruined neighborhood blocks. The grounds are surrounded by the Infinite Mill Creek moat, whose inscrutable geometry protects the field from unwelcome visitors and aspiring Sun-killers.
When walking into the ballpark there is a waterfall feature, believed to be molten gold. The front entrance of the ballpark was angled in such a way that the Sun would rise in line with it and the waterfall on the first day of every new blaseball Season. As best as can be observed, the Sun changed its path slightly following the opening of the Hellmouth to preserve this tradition.
Sun 2, which appeared near the end of Season β10 and has been a constant presence in the skies above Hellmouth ever since, has not demonstrated this property. Talks were underway to build or seek out a system which would turn the ballpark and ensure Sun 2 could rise at season's dawn in alignment, but finalized plans have not yet been forthcoming.
Fan Culture
For more on the Sunbeams' fan culture and chants, see Hellmouth Sunbeams/Fan Culture.
Gameday Traditions
Every time the Beams score a run, a child is allowed to hurl a pane of glass off the highest part of the stadium wall. This has led to numerous incidents of children trying to use psychic powers to manifest runs, which has been a great boost to the team's morale.
At the end of a winning home game, it is customary for the Sunbeams to dump the team's water cooler on the pitcher. The Hellmouth being what it is, this has resulted in 15 hospitalizations for steam burns this season.
In honor of Alexander Horne's revenge-driven grand slam tribute to Velasquez Meadows, fans of the Sunbeams refer to all grand slams as Horne Runs.
The Solympic Flame
At the dawn of every Season, a fire is started somewhere in the Solarium using the sacred light from the easternmost Blaseball location. To date, the flame has been extinguished by Garages fans before the season has concluded. For more information, see the Solympic Flame page.
Notable Chants
Team General
- Call: FIVE SEVEN
- Response: SEVEN EIGHT (Upon victory and/or scoring)
- 5778 is the temperature of the sun in Kelvin
- Response: SEVEN EIGHT (Upon victory and/or scoring)
- Call: STARE INTO THE SUN
- Response: THE SUN STARES BACK
- Call: TOO HOT
- Response: HOT DAMN
- HERE COMES THE SUN
Beams fans are also known to yell players' Soulscreams to cheer them on.
Player Specific
| Player | Cheer |
|---|---|
| Hahn Fox | Call: TOO HAHN (Response: HAHN DAMN) / FOX TROT (when moving) / FOX IN BOX |
| Son Jensen | SON(SUN) |
| Howell Franklin | Awoo! |
| Eugenia Bickle | BIC KILL / Runs Bickled in! |
| Lars Taylor | LONE STAR LARS (with variants for more stars) / YEEHAAW |
| Sandoval Crossing | CROSS 'EM OUT / X X X / You shall not pass |
| Zack Sanders | Throw rocks! / ZACK ATTACK |
| Jayden Wright | ALL RISE, COURT IS IN SESSION / CLOSE THE CASE |
| Sigmund Castillo | HELLS MOVING CASTLE |
| Elvis Figueroa | You've been gnomed |
Shadowed Players
| Player | Cheer |
|---|---|
| Paula Reddick | Call: Who you gonna call-a? (Response: Paula Paula Paula!) / That's the spirit! / REDDICKULOUS |
| Guy Gulp | Thats our Guy! / GG |
| Nagomi Nava | GO GO GOMI / ゴゴゴゴ (when moving) / Gomi go Homi |
| Miguel James | THE FLAMES OF JAMES |
| Phineas Wormthrice | PHINISH IT / PHINISHED |
| Joe Voorhees | GO JOE / GO GO GI JOE (GI stands for Good Intentions) |
| Kaj Statter Jr. | STATTER UP / THE JOCTOR IS IN |
These chants have either fallen out of fashion, or are associated with players no longer on the Sunbeams' roster.
Retired Chants
General
- We are okay!
- Beam me up, Scotty!
- You can't beat the heat!
- (:
Past Players
| Player | Cheer |
|---|---|
| Hendricks Richardson | PROF/PROFESSOR / SCHOOL 'EM PROF / EAT THE PITCH / ON YOUR MARX |
| Siobhan Chark | CHARK ATTACK |
| Avila Guzman | PARTY ANGEL |
| Dudley Mueller | BIG SIPS / BIG HITS / RIP IT AND GRIP IT / HOMERUNCULUS (when scoring a home run) |
| Kaz Fiasco | What a Fiasco! |
| Brisket Friendo | Risk it for the brisket |
| Igneus Delacruz | Delacruzin' |
| Nerd Pacheco | PA CHE CO / That's our Nerd! |
| Sutton Bishop | HONK / Call: IT TAKES A VILLAGE (Response: TO PILOT A GOOSE) / GOOSE CRIMES (when stealing a base) |
| Malik Romayne | Lettuce win! |
| Alaynabella Hollywood | HOLLYWEED (in conjunction with Randall Marijuana) / HOLLYWOOD AND HOLLY COULD |
| Emmett Internet | DIAL UP / CONNECTION ESTABLISHED / aeiou / *dial-up noises* / *sad dial-up noises* |
| Randall Marijuana | HOLLYWEED (in conjunction with Alaynabella Hollywood) |
| Alexander Horne | TOOT TOOT / DOOT DOOT / 🎺 / HORNE RUN (when scoring a home run) |
Fan Works
Have fan art of the Sunbeams? Add it here or at Hellmouth Sunbeams/Fan Works!

Sunbeams Season 5 Lineup
by @Oxyoxspring
Sunbeams Season 7 Lineup
by @alienmandy_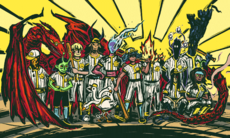
Sunbeams Season 8 Lineup
by Red Fathoms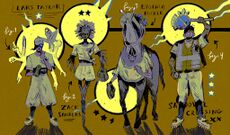
⅘ of the Sunbeams Season 11 Rotation
by Casper Pham
Sunbeams Party Time recipients in Season 10
by larkine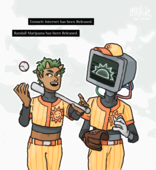
Hall Stars players Emmett Internet and Randall Marijuana, formerly of the Sunbeams
by larkine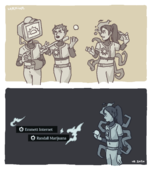
The Precog Trio
by larkine
stay a little longer, please, for me
by @_pysics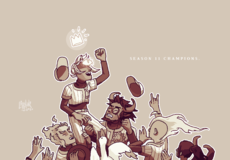
Sunbeams win the Season 11 Championship
by larkine
click to view
Sunbeams Season 11 Championship animation
by @MimimiCee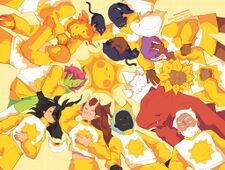
Siesta Sunbeams
by @alienmandy_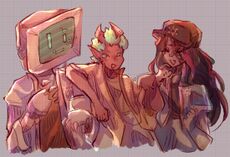
The Only Trio Ever
by @rubiqunda
Nagomi Nava, Nerd Pacheco, Sutton Bishop, and Miguel James offer heartfelt life advice
By Ash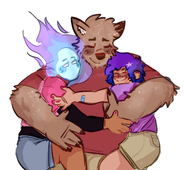
Family
by Jace
Sunbeams Skaters
by @_pysics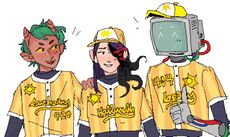
The Precog Trio
by @snorgyfanatic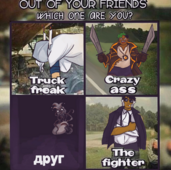
OUT OF YOUR FRIENDS WHICH ONE ARE YOU?
by Ash
Shadows Squaredancing
by Discord user yokorin
Guy Gulp with Aldon Cashmoney
by Saffron
Logo by Kess

Stare into the Sun
poster by Kess
Logo by Kess
Visit Beautiful Hellmouth
by @moldlover


| Players | Batters | |
|---|---|---|
| Pitchers | ||
| Shadows |
|
|
| Buried | Boudicca Midcentury · Doc Anice | |
| Former |
|
|
| Stats | Season | 1 |
| Beta | β1 · β2 · β3 · β4 · β5 · β6 · β7 · β8 · β9 · β10 · β11 · β12 · β13 · β14 · β15 · β16 · β17 · β18 · β19 · β20 · β21 · β22 · β23 · β24 | |
| Circuit | Gamma 2 · Gamma 3 · Gamma 4 | |
| Ballpark | Lower Moab Scenic Overlook Field | |
| Community Lore | ||
| Staff | Sol · Monsieur Beam · JEFF! · Dead Tom · The Man Who Owns All the Teeth · Priya Fox · Determination Montgomery | |
| Places | Hellmouth · Hellmouth Anti-Tourism Board · Shadow Moabbey · Randall Marijuana Memorial Cat Café · Arches National Plark | |
| History | Moab Hellmouth Sunbeams' History · The Solympic Flame · Adaptation · HELIOLATRY · Cuisine of Hellmouth | |
| Fan Culture 📣 · Fan Works 💌 · Tlopps Cards 🃏 | ||
| Stare Into the Sun... | ||
